Feed aggregator
Bronisław Wojciech Linke (1906 - 1962)
Execution In The Ruins Of The Ghetto, 1946
"In the service of humanity" from the series "Atomium", 1958
Rainy Weather, from the series "Screaming Stones", 1946
"Luftwaffe" from the series "Stones Shout", 1948
Team, illustration for the book "Conversations With Silence" by Pola Gojawiczynska, Warszawa, 1936
Heart, from the Cyclus Silesia, 1937
"Blackout, Will There Be War?", 1940
El Mole Rachmim, from the series "Screaming Stones", 1946
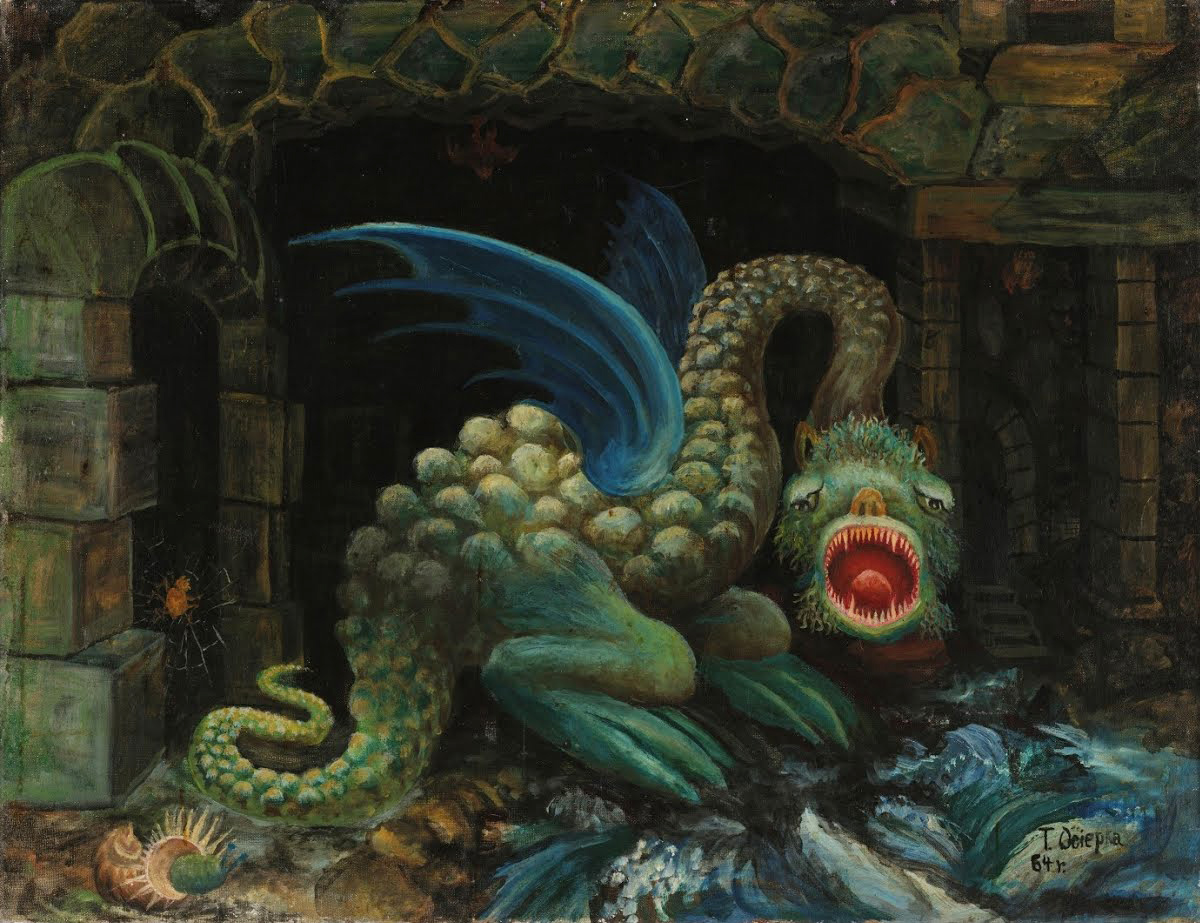
Sea Serpent or "European Army", 1954
"Wlewnice" from the series "Black Silesia", 1937
A biography on the artist's life can be found here.
[Free RPG Day 2020] Keyforge: Secrets of the Crucible – Maw of Abraxas

The contribution to Free RPG Day 2020 from Fantasy Flight Games is Keyforge: Secrets of the Crucible – Maw of Abraxas. This is a quick-start for use with Keyforge: Secrets of the Crucible, the roleplaying game based on the setting for Richard Garfield’s KeyForge: Call of the Archons, the world’s first Unique Deck Game. It uses the Genesys Narrative Dice System—first seen in Warhammer Fantasy Roleplay, Third Edition—but ultimately derived from the original Doom and Descent board games. Keyforge: Secrets of the Crucible – Maw of Abraxas comes with everything necessary to play—an explanation of the rules, four pregenerated characters, and an exciting, action-packed scenario for the Game Master to run. What it does not come with is dice and the fact that both the Genesys Narrative Dice System and Keyforge: Secrets of the Crucible—and therefore Keyforge: Secrets of the Crucible – Maw of Abraxas—use propriety dice is a problem. Not an insurmountable one, but a problem, nonetheless.
Keyforge: Secrets of the Crucible – Maw of Abraxas opens with a rules summary. The core mechanic requires a player to roll a pool of dice to generate successes and should the roll generate enough successes, his character succeeds in the action being attempted. The complexity comes in the number of dice types and the number of symbols that the players need to keep track of. On the plus side, a player will be rolling Ability dice to represent his character’s innate ability and characteristics, Proficiency dice to represent his skill, and Boost dice to represent situational advantages such as time, assistance, and equipment. On the negative side, a player will be rolling Difficulty dice to represent the complexity of the task being undertaken, Challenge dice if it is a particularly difficult task, and Setback dice to represent hindrances such as poor lighting, difficult terrain, and lack of resources. Ability and Difficulty dice are eight-sided, Proficiency and Challenge dice are twelve-sided, and Boost and Setback dice are six-sided.
When rolling, a player wants to generate certain symbols, whilst generating as few as possible of certain others. Success symbols will go towards completing or carrying out the task involved, Advantage symbols grant a positive side effect, and Triumph symbols not only add Successes to the outcome, but indicate a spectacularly positive outcome or result. Failure symbols indicate that the character has not completed or carried out the task, and also cancel out Success symbols; Despair symbols count as Failure symbols indicate a spectacularly negative outcome or result, and cancel out Triumph symbols; and Threat symbols grant a negative side effect and cancel out Advantage symbols. Only Success and Failure results indicate whether or not a character has succeeded at an action—the effects of the Advantage, Triumph, Despair, and Threat symbols come into play regardless of whether the task was a success or not. Task difficulties range from one Difficulty die for easy tasks up to five for Formidable tasks, and in addition, certain abilities enable dice to be upgraded or downgrade, so an Ability die to a Proficiency die or a Challenge die down to a Difficulty die.
In general, the dice mechanics in the Genesys Narrative Dice System—and thus, Keyforge: Secrets of the Crucible – Maw of Abraxas—are straightforward enough despite their complexity. They are perhaps a little fiddly to assemble and may well require a little adjusting to, especially when it comes to narrating the outcome of each dice roll.
Combat is more complex. Initiative is handled by a skill roll—using Cool or Vigilance, and attack difficulties by range and whether or not the combatants are engaged in melee combat. Damage is inflicted as either Strain, Wounds, or Critical Injuries. Strain represents mental and emotional stress, Wounds are physical damage, as are Critical Injuries, but they have a long effect that lasts until a Player Character receives medical treatment. When a Player Character suffers more Wounds than his Wound Threshold, he suffers a Critical Injury, and when he suffers Strain greater than his Strain Threshold, he is incapacitated. The various symbols on the dice can be spent in numerous ways in combat to achieve an array of effects. So a Triumph symbol or enough Advantage symbols could inflict a Critical Injury, allow a Player Character to perform an extra manoeuvre that round, and so on, whilst Threat and Failure symbols inflict Strain on a Player Character, three Threat symbols could be spent to knock a Player Character prone, and so on. Keyforge: Secrets of the Crucible – Maw of Abraxas includes a table of options for spending Advantage, Triumph, Threat, and Despair in combat, as well as a table of critical Injury results. It does not, however, include a table for spending Advantage, Triumph, Threat, and Despair out of combat—a disappointing omission for anyone wanting to do a bit more with their character’s skills. That said, the Game Master should be able to adjust some of the options on the table to non-combat situations.
Lastly, the rules in Keyforge: Secrets of the Crucible – Maw of Abraxas cover NPCs and Story points. Apart from nemesis-type NPCs, most NPCs treat any Strain they suffer as equal to Wounds, and Minions work together as a group. In Keyforge: Secrets of the Crucible, there are two pools of Story Points—one for the Player Characters, one for the GM. They can be used to upgrade a character’s dice pool or the difficulty of a skill check targeting a character—NPC or Player Character in either case, or to add an element or aspect to the ongoing story. The clever bit is that when a Story Point is spent, it does not leave the game, but is shifted over to the pool of Story Points. So if the Game Master spends a Story Point to increase the difficulty of a Player Character’s Perception check to determine the motives of an NPC, she withdraws it from her own Game Master pool of Story Points and adds it to the players’ pool of Story Points. As a game proceeds and Story Points are spent and move back and forth, it adds an elegant narrative flow to the mechanics and will often force the players to agonise whether they should spend a Story Point or not as they know it is going to benefit the Game Master and her NPCs before it comes back to them.
A character in Keyforge: Secrets of the Crucible has six characteristics—Agility, Brawn, Cunning, Intellect, Presence, and Willpower, plus a range of skills from Charm, Computers, and Cool to Ranged (attacks), Skulduggery, and Vigilance, as well as range of special abilities. The four pregenerated Player Characters include a Saurian Crœniac with a Cybersensor Implant for better perception and a hacking rig; a Human Discoverer whose Zoomclaw is a rocket-propelled grappling hook that both climbing tool and weapon; a Spirit Arbitrator, an incorporeal being clad in containment armour who was exiled from his knightly order for bounding with a sentient sword called Vizer; and an Elf of the Shadowws whose faerie companions aid him in mechanical tasks and acts of skulduggery. All four Player Characters are nicely presented in a busy, but easy to access character sheet.
Each Player Character also has a way to use Æmber, the golden, glowing substance found only on the Crucible—the setting for Keyforge: Secrets of the Crucible—which is often processed to perform a single, specific function, such as currency. In its raw state it can be used to do strange and wondrous things. For example, Saurian Crœniac uses it to fuel a hazard field which makes attacks against more difficult, the Human Discoverer to make attacks with Zoomclaw jet-propelled, and so on. These are all one-shot abilities until the characters can obtain some more raw Æmber.
The setting for ‘Maw of Abraxas’, the scenario in Keyforge: Secrets of the Crucible – Maw of Abraxas is Crucible, the ‘Impossible World’, a Jupiter-sized world made up of innumerable different zones, each a different environment or climate. In effect, it is a multiverse in one place, a multi-genre setting made up of multiple settings. In ‘Maw of Abraxas’, the Player Characters will see just a few of them—a glass jungle, a tightly regulated agrisector, a lake wrought with multiple storms, and the ancient ruins of a lost civilisation. In the scenario, the quartet of heroes have been asked by their boss, the tentacular Fixer, to recover the Cube of Realities, a weird artefact with the capability of warping the world around its user. He wants to ensure that it does not fall into the wrong hands. Unfortunately, the militant, xenophobic Martians already have it, but to prevent it being stolen or falling into the hands of their enemies have hidden it aboard a prototype saucer ship which even they cannot track or scan for! However, contact with the saucer has been lost, but fixer has learned that its designer created a device, the Vez Q-37 Scanulator, which can detect where the saucer is. So all the Player Characters have to do is steal the Vez Q-37 Scanulator from a Martian base and fight their way out, get across several sectors by Teleporter Cannon and then a couple more by whatever means necessary, find the lost saucer ship and grab the Cube of Realities. Easy, right? Of course not!
Consisting of just three acts, ‘Maw of Abraxas’ begins by dropping the Player Characters in media res and never lets up on the action or pacing. It should provide a session or so’s worth of play and comes with suggestions as to what each Player Character could do in a scene, and showcases a little of the diversity of the Crucible as a setting. The Player Characters all feel very different and the adventure should give them each a chance to shine.
Physically, Keyforge: Secrets of the Crucible – Maw of Abraxas is very nicely presented, in full vibrant colour. The artwork is excellent, if a little busy in places, and the book is well written and easy to understand.
The one downside to Keyforge: Secrets of the Crucible – Maw of Abraxas is that it uses the Genesys Narrative Dice System and that means using propriety dice. Now on the weekend of Free RPG Day 2020, the dice app for Genesys was available for free and that was very generous of the publisher. Of course, if a group is already playing Genesys or Keyforge: Secrets of the Crucible, and has either the dice or the app, then Keyforge: Secrets of the Crucible – Maw of Abraxas is easy enough to run and play, whether that is as extra scenario for an existing Keyforge: Secrets of the Crucible campaign or as an introduction to the setting. If not, then Keyforge: Secrets of the Crucible – Maw of Abraxas is unplayable, which is a pity because it is a fun scenario, though of course, a Game Master might be inspired to get either dice or app after reading though it so that she can run the scenario.
That issue aside, Keyforge: Secrets of the Crucible – Maw of Abraxas is an entertaining and fun introduction to Keyforge: Secrets of the Crucible. As a quick-start to both rules and setting, it is exactly the type of thing you want to pick up on Free RPG Day.
The Jewel in the Skull: ‘James Cawthorne: The Man and His Art’
Richard McKenna / September 17, 2020

By Maureen Cawthorn Bell
Jayde Design Books, 2018
Stuff has to happen when it has to happen, I suppose. Back in the summer of 2018, I’d pre-ordered a copy of James Cawthorn: The Man and His Art, but by the time it was released, the family health issues that had been increasingly dominating my life over previous years had consumed it completely. When the book arrived, I didn’t even leaf through it; just unwrapped it and stuck it on a shelf, registering only that it weighed a ton and must be hundreds of pages long. And perhaps because of its association with a sad time, I completely forgot about its existence for a couple of years, only finally opening it the other night on a sudden impulse. Would what it contained be powerful enough to burn off any negative personal associations and also not be the kind of dismal self-congratulatory fannery that makes you want to chuck all your books away and start getting into metalworking or something? Well, yes it would—James Cawthorn: The Man and His Art is absolutely fucking mind-blowing.
Back in the ’70s and ’80s, Cawthorn was everywhere: the covers of his comic book adaptations of Michael Moorcock’s Elric stories were a fixture on the wall of every head shop, goth shop, comic shop, second-hand bookshop, and pawn shop I entered until I was in my mid-20s, and I’d grown up seeing his illustrations in things like New English Library’s Strange World of Science Fiction, the Savoy Books edition of Moorcock’s The Golden Barge, and the four kids’ sci-fi anthologies that Armada books put out in the 1970s. But, weirdly, it wasn’t until I sat down with this volume that I realized just how deeply his work saturates my own aesthetic life. Which is to say, my life. Not that I’m claiming my aesthetic or actual life are of two shits’ worth of interest to anyone except myself, of course, but it’s a strange feeling to suddenly realize that the blur that’s always been there at the edge of your attention is actually one of the spinning flywheels driving your mind—reminding you how many of those people existing on the margins of the culture remain marginal despite their contributions to shaping it. Cawthorn—who passed away in 2008—is a recognized figure among genre obsessives, but how did someone so interesting and idiosyncratic, who was once so ubiquitous, fall into such relative neglect?
Cawthorn was a child of the North East, an unfairly disregarded region of England, historically far from the money of London or Manchester, that has suffered massively since the Conservative government led by Margaret Thatcher set in motion the definitive closing down of the mines, heavy industry, and shipyards that had been the area’s backbone for centuries. As the final remnants of the steelworks and shipyards are gradually sold off to venture capitalists, that process of neglect is now pretty much complete, yet it’s a beautiful and magical place with its own strange magic, with deep links both to the ancient past and to the future—which makes sense, given how much of the future the locals dug, hammered, and welded together before they were sold out by the Tories. If you’re in any doubt about the North East’s futurist vocation, just remember that some of our culture’s most pervasive images of the future are the handiwork of another product of the region, one Ridley Scott, who certainly took inspiration from the vast petrochemical complexes lining local rivers (as anyone who ever flew into Teesside airport at night can testify). A self-taught, working-class illustrator, Cawthorn seems like a perfect reflection of that local genius, and in a way his relative anonymity mirrors that of his native land.
James Cawthorn: The Man and His Art contains (apparently—I didn’t count) something like 800 color and black and white illustrations that cover his entire career. The contrast between the scratchy detail and dense chiaroscuro of his b&w work and the vaguely lysergic glow of his color art highlight how the two exist as entirely distinct entities, which, however, complement and complete one another when seen together here. And his color work also inspires the thought that perhaps Cawthorn’s relative oblivion is partly due to his style being too outsider-ey, too delicate and lurid (in a good way) to work at its best in the medium that was most lucrative and that offered most visibility during the time he was working—the paperback cover.

In fact, one striking thing about Cawthorn’s work is that it always retains the beauty of the obsessive amateur, never feeling glib or by-the-numbers. Even in the drawings that look most rushed, you can feel the commitment animating each piece—the euphoric sensation of watching cheap felt-tip pens somehow create entire new worlds. And unlike many other artists, Cawthorn’s aesthetic becomes more, not less, compelling and intense the more of it you see, as he endlessly mines and refines the mineral splendors of his own imagination in pursuit of his totally individual aesthetic. Looking through the book, it rapidly becomes clear that Cawthorn’s best-known images—to those who know them—aren’t even his most striking. In fact, it’s difficult to illustrate this review properly because some of his most memorable work doesn’t exist even in the daunting repository of everything that is the internet, and I don’t want to bugger up the spine on my copy.
The book has clearly been a labor of love for Cawthorn’s sister Maureen and publisher John Davey, and Maureen’s evocative and delicate memoir of him casts a lot of light on the personality behind the portfolio of artwork. Alan Moore and Michael Moorcock (a close friend of Cawthorn from his youth until Cawthorn’s death) both provide genuinely touching contributions, and the ever-reliable John Coulthart does a lovely job of arranging and presenting everything in a way that makes sense of the ridiculous amount of material, which ranges from the comics Cawthorn drew at school to the lovely t-shirts and birthday cards he produced in mind-boggling numbers for family and friends.
So like I said, James Cawthorn: The Man and His Art is absolutely fucking mind-blowing, a reminder of the violently surreal and inspiring power that imagery of this kind can possess when emptied of retrogressive cliché and self-satisfied rhetoric and filtered through a distinctive talent. It’s a potent inducement to pick up a pen, or a pencil, or a keyboard, or just anything, and put your imagination into use.
Richard McKenna grew up in the visionary utopia of 1970s South Yorkshire and now ekes out a living among the crumbling ruins of Rome, from whence he dreams of being rescued by the Terran Trade Authority.
Portals and Presences: The Surreal Landscapes of Hipgnosis
Michael Grasso / September 16, 2020

By Aubrey Powell
Thames & Hudson, 2017
There’s always a danger of excessively romanticizing the era of the vinyl LP. Issues of sonic fidelity and durability aside, though, there’s one aspect of records on 12-inch wax that seemingly everyone does miss, and that’s the full-size record cover. Album covers during the heyday of psychedelic rock and roll were gateways to other worlds, their art often the province of esteemed painters and illustrators, their cryptic surrealism often filled with esoteric codes and symbols. Probably no other artistic collective was more famous during this decadent era than the London partnership known as Hipgnosis. From its edenic origins palling around with the rising stars of the late-’60s London psychedelic underground through to its mature period making iconic platinum album covers for global sensations like Pink Floyd, Paul McCartney, and Led Zeppelin, the creative forces behind Hipgnosis gained a rightful reputation as artistic visionaries whose work didn’t merely create identifiable brands and images for a musical group. Hipgnosis covers added to the mystique of the music, creating a visual component that rendered itself an indelible part of the listening experience.
“Album covers… defined you,” says Hipgnosis founder Aubrey “Po” Powell in his “Welcome to Hipgnosis” history in 2017’s Vinyl . Album . Cover . Art: The Complete Hipgnosis Catalogue, a 300 plus page full-color hardcover monster that reproduces the collective’s entire album cover output from 1967 to 1984. “The covers gave an inkling of your personality, your musical tastes and preferences, and just how up to date and hip you were.” Powell, Hipgnosis’s photographer, met his creative partner Storm Thorgerson at a hashish-suffused party across the street from his rooming house (that was suddenly raided by the police) attended by much of Pink Floyd. In that afternoon, a bond was formed between Powell and Thorgerson, a graduate student in film at the Royal College of Art. In these swinging, soon-to-turn-psychedelic times, Thorgerson and Powell were at the center of a music and art scene that would break out of the cozy confines of a few odd students and onto the global stage. Named after a piece of graffiti that Floyd’s Syd Barrett scrawled on the door to their apartment in pen, Thorgerson and Powell’s partnership (Throbbing Gristle member Peter “Sleazy” Christopherson would join in the mid-1970s) created some of the most memorable album covers of the era.
Hipgnosis’s first rock client was Pink Floyd: seen here are three of their Floyd covers: the Dr. Strange-meets-real-life-alchemy of 1968’s A Saucerful of Secrets, the recursive design of 1969’s double album Ummagumma, and the iconic 1973 cover for The Dark Side of the Moon.
Vinyl . Album . Cover . Art . itself is equal parts fond (post-)hippie memoir and hard-nosed realistic account of what it was like to run a business in the often high pressure, big-money business of 1970s rock ‘n’ roll. The book contains a brief—if frank and fascinating—foreword from Peter Gabriel, who worked with Hipgnosis while leading Genesis and for his first three solo album covers. Throughout the hundreds of album covers, Powell provides a wry and informative running commentary on the personalities, problems, and sudden moments of inspiration—provided by both musicians and the cultural and natural environment—that contributed to Hipgnosis’s success. The Surrealist movement of the 1920s and specifically photographer Man Ray get quite a few name-drops in Powell’s assessment of the Hipgnosis catalog, and it’s easy to see why. The nude human form, out-of-place manmade objects juxtaposed with the organic, obvious, and often unnatural-looking photo collage: all of these definitive Surrealist techniques appear with frequency in Hipgnosis’s early output.
Much of the overall aesthetic of psychedelic rock took its inspiration from long-past artistic movements with Romantic, back-to-nature overtones: Art Nouveau and Arts and Crafts, notably. With the surrealist edge of Hipgnosis’s designs, however, a flash of danger and alien weirdness was added to rock’s visual lexicon. Hipgnosis’s efforts at whimsical storybook-style covers for the Hollies and Genesis stick out like sore thumbs: solid efforts, but very much against the subversive grain of most of their work at the time. The covers where Hipgnosis unites Victorian twee with counterculture edge—such as using century-old techniques to hand-tint pastel color on Powell’s contemporary photos—do provide a pleasing synthesis of old and new.
Gentle nostalgic folkie Al Stewart’s understated style might not seem like it jibes with the fantastic scenes conjured on Past, Present and Future (1973) and Time Passages (1978). On the other hand, Dark Side of the Moon producer-turned-bandleader Alan Parsons’s 1978 album Pyramid was directly influenced by Parsons being “preoccupied with the Great Pyramid of Giza,” to the point of “obsession” and “out-of-body experience.”
But it’s not just the art movements of the past that provided Hipgnosis with ambient inspiration. The counterculture’s well-attested conscious fusion of old and new, of the esoteric with contemporary pop and outsider culture, including science fiction and comic books, is on display throughout the Hipgnosis corpus. One of their very first commissions, Pink Floyd’s 1968 A Saucerful of Secrets, very obviously embodies this fusion, with its mixture of images from “Marvel comics and alchemical books.” Powell and Thorgerson attest to their being “avid followers of Stan Lee… Steve Ditko and Jack Kirby,” all while recognizing that “in those heady days of 1968—a man was soon to land on the Moon, alchemy was a hot topic, extraterrestrials were a certainty, Tarot readings and throwing the I Ching were de rigueur—the search for enlightenment in the East was a definite must.”
Whichever way the cultural winds were blowing, Thorgerson and Powell always forged a link to the music in their designs. Even in cases where the imagery looks too mystically epic or weird for the music on the disk, such as the covers for Scottish folk musician Al Stewart’s Past, Present, and Future (1973) and Time Passages (1978), the music’s overall themes—remembrance, nostalgia, prophecy, and folk memory—contain a tenuous throughline justifying figures leaping through strange mystic portals or tuning into a radio station that glitches out all of reality. All these strains of the magical and surreal, from Renaissance alchemists to haunted Victorian portraitists to avant-garde plumbers of the post-World War I collective unconscious to Dr. Strange and the Silver Surfer—Hipgnosis synthesized these with the subconscious themes of the music to create visions that defied reality. Powell’s photographic eye and Thorgerson’s dreamlike visions found common cause in composing images that looked like set pieces on strange alien worlds or in magical faerie realms. But even with all the photographic trickery and post-production flourishes available to them as they moved out of student darkrooms and into their own studio, Hipgnosis still found inspiration out there on our Earth’s weirdest real-life spots. From the Giant’s Causeway in Ireland to a cracked, dry Tees estuary in the North of England to deserts in North Africa and the American West, Hipgnosis’s most memorable landscapes are worlds where something has gone awry, where weird monuments, alien beings, and strange hauntings abound.
Hipgnosis had a knack for using unique real-world backdrops to create eerie scenes for their album covers. Italian rock progressivo group Uno’s self-titled 1974 album depicts a mysterious hieratic harlequin with a glowing geodesic dome for a brain emulating the pose of the famous English chalk figure, the Long Man of Wilmington.
Of course there are the usual stories of rock star excess in the book, with the personnel from Hipgnosis being flown all across the world for photo shoots and consultations with the biggest names in ’70s corporate rock. In many cases, the musicians and managers themselves couldn’t resist being part of the process. Paul McCartney enjoyed hamming it up on the cover of Band on the Run, and a few years later Macca wanted to be the one to personally place the giant letters on a London theater marquee for the cover of Wings At The Speed Of Sound. Noted hard case Peter Grant, the imposing manager of Led Zeppelin, was giddy—he “burbled with glee,” according to Powell—over Hipgnosis’s proposal for a worldwide scavenger hunt of a thousand replicas of the eerie totem from the cover of 1976’s Presence. One could argue that Hipgnosis, Led Zeppelin, and Peter Grant invented the music industry alternate-reality game in 1976 (sadly, the surprise Presence publicity stunt never got off the ground after it was leaked by the music trades).
Powell is honest throughout the book about the various misfires; he finds some of their ideas in ridiculously poor taste upon reassessment and most modern observers would be hard-pressed to disagree. The collective’s pinpoint arch visual humor certainly sometimes misses the mark. If I were to sum it up: the Hipgnosis catalog contains a few dozen stone-cold classics, a bunch of forgettable designs, and a few that look like rejects for Spinal Tap’s album Shark Sandwich. Hipgnosis’s wit was used to best effect when channeling those common cultural currents mentioned above: for example, 10cc’s classic cover for their album Deceptive Bends—the creation of which is broken down in great detail by the late Thorgersen in a contemporary piece from 1977 included in the book—talks about the physical and logistical challenges in place from the beginning but also places the imagery of the diver carrying the helpless damsel in its proper context with “monster” B-movies like Creature From the Black Lagoon (1954) and Robot Monster (1953). Trawling our collective pop culture unconscious, Hipgnosis called forth all kinds of creatures from the deep over their less than two decades on Earth, creatures that walk amongst us long after the collective’s demise.
Michael Grasso is a Senior Editor at We Are the Mutants. He is a Bostonian, a museum professional, and a podcaster. Follow him on Twitter at @MutantsMichael.
Feliks Jabłczyński - Mephisto, 1893
A Coke and a Smile: Tsunehisa Kimura’s ‘Americanism’
Exhibit / September 15, 2020
Americanism, 1982
Object Name: Americanism
Maker and Year: Tsunehisa Kimura, 1982
Object Type: Photomontage
Description: (K.E. Roberts)
Unlike his younger compatriots Shusei Nagaoka, Hajime Sorayama, Eizin Suzuki, and Hiroshi Nagai, who broke into the American illustration market with glistening airbrushed futures and breezy, pastel-colored beach scenes, Tsunehisa Kimura’s output was absurd, darkly surreal, and often apocalyptic. He remembered the devastation wrought by the war, and aimed his photomontage squarely at imperialism, colonialism, and, during the 1980s, a locked-and-loaded America whose leaders were playing an increasingly dangerous game that might have enveloped the entire globe.
Kimura’s most recognized piece is probably Waterfall, circa 1979, which shows Manhattan beset by, or rather integrated with, Niagara Falls. The scene evokes disaster, but there’s something serene about it too—the riotous natural world and the built environment appear to commune, as is the goal in traditional Japanese architecture; not so in America, where we build things to keep nature—including other people—out. New York is frequently Kimura’s muse: New York encased in crackling ice; New York encased in fire at the end of the world (or is it the violent beginning of the world?); an ocean liner (is it the Titanic?) stands in for the Hindenburg, running aground on the Empire State Building.
There’s nothing serene about Kimura’s cover to the 1984 Midnight Oil LP Red Sails in the Sunset, either, showing a bombed-out, scorched-earth Sydney. A simmering red sun settles in the dust, similar to the black sun that precedes the atomic explosion in Katsuhiro Otomo’s Akira (1982-1990). And his cover for Space Circus’s Fantastic Arrival (1979), where American astronauts caper about on the Moon—while on fire—is similarly uncomfortable. Waterfall, in various edits, has also appeared on several LP covers.
Americanism is a pointed critique of both WWII-era (the photos are from the ’40s) and ’80s America, consumed with consuming and not much else, though the world (including Hiroshima and Nagasaki) may burn. The ironic nonchalance of the juxtaposition is, once again, striking. The Statue of Liberty is drowned (a long-standing visual motif in sci-fi) in a 1977 photo, and an untitled piece from 1984 shows the noble lady once again, this time hurtling over (or towards) the New York skyline under the power of six American ICBMs—which huddle beneath her skirts!
Kimura’s work was collected in 1979’s appropriately title Visual Scandals by Photomontage, as far as I know the only such collection published in the US.
[Free RPG Day 2020] Starfinder: Skitter Home

One of the perennial contributors is Paizo, Inc., a publisher whose titles for both the Pathfinder Roleplaying Game and the Starfinder Roleplaying Game have proved popular and often in demand long after Free RPG Day. For 2020, the title released for the Pathfinder Roleplaying Game is Little Trouble in Big Absalom, and the title released for the Starfinder Roleplaying Game is Starfinder: Skitter Home. As in past years, this is an adventure involving four of the cheerfully manic, gleefully helpful, vibrantly coloured, six-armed and furry creatures known as Skittermanders—Dakoyo, Gazigaz, Nako, and Quonx. They were introduced in the Free RPG Day adventure for 2018, Starfinder: Skitter Shot, in which as the crew of the starship Clutch performed salvage tasks in the Vast beyond the Pact Worlds and then came across a derelict luxury liner, before being boarded by pirates and forced to crash land on a nearby world and survive as detailed in the Free RPG Day adventure for 2019, Starfinder: Skitter Crash. The foursome return in Starfinder: Skitter Home—not to have adventures, but to have fun!
Starfinder: Skitter Home shares elements with Little Trouble in Big Absalom. Both are written for player characters of Fourth Level and both consist of two adventures which can be run together or separately—and in any order. In Starfinder: Skitter Home, the four Skittermanders have come to their home world of Vesk-3 for a vacation—first for a party and a celebration, and then for a leisurely safari. The party, detailed in the scenario ‘Festival of the Exclipse’, is at Reetamander, a festival celebrating a lunar eclipse on the skittermanders’ home world. There are games to play, market stalls to peruse, songs to sing, and once the eclipse is over, food and drink aplenty. Events—or rather the intervention of a horrid villain—means that things go awry, but the heroes do get to have some fun first. Unfortunately, the villain turns the Reetamander against its celebrants and the heroes must come to their rescue and stop him from enacting his inconceivable plan! Overall, ‘Festival of the Eclipse’ is a fun adventure, intentionally raucous—even a little riotous, and a very positive adventure since it plays into the helpful nature of the Skittermanders and there are some nice rewards for the Player Characters being helpful.
The second part, or scenario, in Starfinder: Skitter Home is much darker and a shift in tone. In ‘Hunters Hunted’ the heroes have been given the gift of an underground hunting expedition into the caves beneath Vesta-3 where stridermanders—massive, terrifying cousins of the skittermander species—are said to be found. Unfortunately, when the Skittermanders arrive at the hunt agency, it seems all trips into the caves are off, because contact has been lost with the last trip which went into the caves. Of course, the Skittermanders, being as naturally helpful as they are, they offer to join the search for the lost hunting party and pointed to an ancient side tunnel which nobody has been able to check yet due to the agency being short-staffed. ‘Hunters Hunted’ is a mini-dungeon, consisting of just eight locations, and focusing on stealth and exploration. It is all perfectly playable and enjoyable, but not quite as much fun—and nowhere near as raucous as ‘Festival of the Eclipse’. There is a sense of urgency to it though, as the surviving members of the lost party are hurt and very much in need a rescue.
Rounding out Starfinder: Skitter Home are the Skittermander pre-generated characters. There are four of these provided for use with Starfinder: Skitter Shot. They include a Priest Mystic, a Xenoseeker Mystic, a Spacefarer Soldier, and a Scholar Mechanic, all Third Level (up one Level from Starfinder: Skitter Crash). Each is detailed on a full page, complete with background and a really nice illustration, as well as the stats. Players will need to refer to the Starfinder Alien Archive for full details of the Skittermanders, but really, they should be played as they appear—bumptious, gleeful, up for a challenge, and manically helpful!
Physically, as with Starfinder: Skitter Shot and Starfinder: Skitter Crash, Starfinder: Skitter Home is very nicely laid out and presented. The artwork is excellent, the writing clear, and the maps—placed inside the front and back covers—easy to use. All exactly as you would expect for a scenario from Paizo, Inc.
If a group has played Starfinder: Skitter Shot and Starfinder: Skitter Crash before it, then doubtless they will be pleased to return to playing the humorous, if not silly, Skittermanders. Players new to Starfinder and Skitterfinders may find the rules of the Starfinder Roleplaying Game slightly more complex than they expect and they certainly will not have the same sense of attachment to the Skitterfinder quartet as someone who has played either—or both—Starfinder: Skitter Shot and Starfinder: Skitter Crash will have. Either way, the likelihood is that they will enjoy ‘Festival of the Eclipse’ more than they will ‘Hunters Hunted’, as it gives more scope for fun and action, and gives more for them to do, whereas ‘Hunters Hunted’ is just a bit too straightforward an adventure to be really exciting. Overall, Starfinder: Skitter Home is very nicely presented, but really one for fans of the Starfinder Roleplaying Game rather than a good introduction to it.
Sunday Morning Porch Sales, September 13, 2020. Go Big or Go Extinct.
Video Hyped the Carnivorous Plant Gallery
More DM-ing in the Town of Rosewich and environs.
Svobod the Mule smiled to himself. Things had sure turned for the better. He couldn't help a satisified grunt as he stretched slowly and extended his muzzle into the trough for a breakfast of good oats. These new friends were first rate folks, and he'd decided he'd look after them.

Munching away, his mind turned back to the old witch, one of a long line of cruel, dumb, and selfish "owners" who'd come into his life since the old Poopseller had passed, Bless his soul. The witch was the worst, tying him up in that Barrow while she rummaged for something called the Table service of King Jaques, bah, the gelly cube that ate her did the world a favor.
Why are hoomans so silly anyway? I mean, they take the God's good oats, beat them, crush them up, dry them out, THEN put them back in water, heat them till they boil in an iron pot, THEN put them into yet another bowl, and wait for them to cool off again, and all that takes time and effort,mind you, before they finally eat, which they have to do out of special little magic tableware? what nonsense! Svobod snorted so hard oats flew up his nose.
Well at least these new ones were good fellows, it's nice to spend the night in a warm barn with nice smelling straw, the grooming girl does a good straw rub-down, the other stalls have interesting horses from all over with all kinds of horse-gossip, the oats are first rate...and not a whip or chain in sight. No...these new adventurers were under his protection now... if only they'd stop calling him Francis...a girl's name...so demeaning.
[Free RPG Day 2020] Junior Braves Survival Guide to the Apocalypse Quick-Start

The Junior Braves Survival Guide to the Apocalypse Quick-Start is the second title for Free RPG Day 2020 to be ‘Powered by Kids on Bikes’, the other being Kids on Brooms. Published by Renegade Games Studios and based on the Junior Braves Survival Guide to the Apocalypse graphic novel series, the players take on the roles of Junior Braves, essentially the equivalent of young scouts who are have gone away on camp for week to learn outdoor skills, good citizenship, and teamwork. Unfortunately, since they went away, something has happened, something which has caused apocalypse and brought society to its knees. Of course, being away from their family, friends, and society at large, the Junior Braves have no idea exactly what happened, so part of playing through the Junior Braves Survival Guide to the Apocalypse Quick-Start is about establishing what happened as much as it is establishing contact with their friends and families.
The Junior Braves Survival Guide to the Apocalypse Quick-Start comes nicely complete. It includes a good explanation of the rules, six pregenerated Player Characters, and a sandbox ready for a group to play. In this way, it is complete and presents a ready-to-play package in a way which Kids on Brooms failed to be.
Instead of character generation, the Junior Braves Survival Guide to the Apocalypse Quick-Start includes six Tropes—or basic character types. These are Honcho, Rustic, Ruffian, Tinkerer, Dreamer, and Tribe Master—the latter the leader of the troupe whom the Game Master roleplays as well as the NPCs. Each of these has its own special ability. For example, when the Dreamer earns a Brave Token—the equivalent of luck points or tokens—his player must give one to another Junior Brave, and the Ruffian gains a +3 bonus to solve problems involving force or chutzpah when his player spends a Brave Token. As per Kids on Bikes, each Junior Brave is defined by six stats—Brains, Brawn, Charm, Fight, Flight, and Grit—to which are attached to a die type, from a twenty-sided die for the character’s best stat down to a four-sided die for his worst stat. The ten-sided die represents an above average stat, whereas an eight-sided die represents a below average stat. So, a Honcho has a Charm d20, Fight d12, Grit d10, Brawn d8, Brains d6, and Flight d4, and a Rustic has Brawn d20, Charm d12, Flight d10, Brains d8, Fight d6, and Grit d4.
Tropes in the Junior Braves Survival Guide to the Apocalypse and thus the quick-start do not have skills, but in keeping with the theme of the game, they have Skill Patches, each sewn onto their Skill Sashes. Example Skill Patches include Orienteering, Woodworking, Knots & Ropes, Radios & Codes, and Sign Language. Each of these grants a +3 bonus to skill rolls—or possibly +1 bonus if only tangentially relevant. A Junior Brave will also have a Flaw, which can complicate his actions and increase the Target his player needs beat on a die roll. If a Junior Brave fails a roll due to his Flaw, he earns two Brave Tokens rather than the one usually awarded for failure. Lastly, a Junior Brave has some equipment and gear, stored in his ‘Pack and Pockets’. These consist of a pocketknife, sleeping bag, and a canteen, plus three items he would have had with him on the camp. Some of these are limited use items and will likely run out during the adventure included in Junior Braves Survival Guide to the Apocalypse Quick-Start.
Mechanically, the Junior Braves Survival Guide to the Apocalypse Quick-Start uses the same mechanics as Kids on Bikes, Teens in Space, and Kids on Brooms, with each of a Junior Brave’s stats being represented by a single die type. For a Junior Brave to do something, his player rolls the appropriate die for his Trope’s stat and attempts to roll over a difficulty number set by the Game Master, for example, between ten and twelve for an impressive task that a skilled person should be able to do. A player can add a +3 bonus if his Junior Scout has an appropriate Skill Patch and a +1 bonus for any Brave Tokens he wants to spend—or his fellow players want to spend if their Junior Braves are collaborating. However, complications increase the difficulty of the target number by three for each one. If the die roll beats the difficulty number, the Junior Scout succeeds, but if the roll is equal to the difficulty number, then he succeeds at cost, as in ‘Yes, but…’. It should be noted that the mechanics in Junior Braves Survival Guide to the Apocalypse Quick-Start that player-facing in that only the player roll dice—the Game Master never does.
A potential cost of failure is Stress and Trauma. Stress typically consists of bruises, cuts, scrapes, panic attacks, depression, and other forms of distress. Stress can add a complication to an action, but overnight rest or reassurance can get rid of Stress. However, should a Junior Brave suffer more than four Stress, he suffers from a Trauma. This represents serious injury or distress and until the Junior Brave recovers—which takes either medical treatment or weeks of rest—he cannot use one of his Stats.
Just as the Junior Braves Survival Guide to the Apocalypse categorises damage into Stress and Trauma, it divides its adversaries and dangers into Troubles and Threats. Troubles are the overall danger, the ultimate cause of the danger that the Junior Braves must face and , such as a zombie uprising, alien invasion, and the like, whilst Threats are individual parts of the Troubles the Junior Braves will encounter upon returning from camp. Notably, Threats are scaled down in Junior Braves Survival Guide to the Apocalypse, so if a town is taken over by a biker gang, Junior Braves will deal with a few of the Bikers rather than whole gang. The point is that as much as Junior Braves Survival Guide to the Apocalypse is a post-apocalypse roleplaying game, it is lighter in tone and scaled to the capabilities of the Junior Braves, who are , after all, still children.
Rounding out Junior Braves Survival Guide to the Apocalypse Quick-Start is a complete set of starting characters, as well as ‘Perils at the Pit-Stop’, a complete campaign starter. The Junior Braves return home from camp and taking a break from the journey in the town of Penelope, discover the clerk at the gas station was dead and zombie-like. What has happened and is it like the zombie television show the Junior Braves are definitely not allowed to watch? ‘Perils at the Pit-Stop’ includes a full description of the town, its current factions, and hints at some of the mysteries going in within its boundaries. It is essentially a mini-sandbox, a place for the Junior Braves to explore and make discoveries, and so there is no single defined plot or outcome, though there are several Troubles which they will encounter.
Physically, the Junior Braves Survival Guide to the Apocalypse Quick-Start is a simple black and white booklet. It is well written, the artwork is good, and the map nicely done.
Like other ‘Powered by Kids on Bikes’ roleplaying games, the Junior Braves Survival Guide to the Apocalypse Quick-Start is easy to pick and up and play, the rules are simple—made all the easier by being player-facing, and the set-up easy to grasp. Unlike Kids on Brooms, the Junior Braves Survival Guide to the Apocalypse Quick-Start comes with everything necessary to play. So with just the five characters and the given scenario, ‘Perils at the Pit-Stop’, the Junior Braves Survival Guide to the Apocalypse Quick-Start should provide both a couple of sessions’ worth of play and a good introduction to the full roleplaying game and the setting.
Jonstown Jottings #28: Tradition: Sandheart Volume Three
—oOo—

Tradition: Sandheart Volume Three is both the third part of the campaign set in Sun County in Prax following on Tales of the Sun County Militia: Sandheart Volume 1 and The Corn Dolls: Sandheart Volume 2, and a campaign framework for all three parts, for use with RuneQuest: Roleplaying in Glorantha.
It is an eighty-nine-page, full colour, 29.15 MB PDF.
It is an eighty-nine page, full colour hardback.
Tradition: Sandheart Volume Three is well presented and decently written, with artwork that is full of character—the image of a VW Camper Rhino disgorging sixties-style hippies on the India hippie trail is worth the price of admission alone.
Where is it set?
As with Tales of the Sun County Militia: Sandheart Volume 1 and The Corn Dolls: Sandheart Volume 2 before it, Tradition: Sandheart Volume Three takes place in Sun County, the small, isolated province of Yelmalio-worshipping farmers and soldiers located in the fertile River of Cradles valley of Eastern Prax, south of the city of Pavis, where it is beset by hostile nomads and surrounded by dry desert. Where Tales of the Sun County Militia: Sandheart Volume 1 is specifically it is set in and around the remote hamlet of Sandheart, where the inhabitants are used to dealing and even trading with the nomads who come to worship at the ruins inside Sandheart’s walls and The Corn Dolls: Sandheart Volume 2 is set in and around Cliffheath, on the eastern edge of the county, Tradition: Sandheart Volume Three is set in and around a cave known as Dark Watch on the far western edge of the county.
Who do you play?
The player characters are members of the Sun County militia based in Sandheart. Used to dealing with nomads and outsiders and oddities and agitators, the local militia serves as the dumping ground for any militia member who proves too difficult to deal with by the often xenophobic, misogynistic, repressive, and strict culture of both Sun County and the Sun County militia. It also accepts nomads and outsiders, foreigners and non-Yemalions, not necessarily as regular militia-men, but as ‘specials’, better capable of dealing with said foreigners and non-Yemalions.
What do you need?
Tradition: Sandheart Volume Three requires RuneQuest: Roleplaying in Glorantha. RuneQuest – Glorantha Bestiary might be useful.
What do you get?
Tradition: Sandheart Volume Three is not really a scenario, but more a campaign framework around which the earlier scenarios, Tales of the Sun County Militia: Sandheart Volume 1 and The Corn Dolls: Sandheart Volume 2 can take place, as well as other scenarios of the Game Master’s choice or devising. This is because it concerns events at one location, a location that by tradition—and if the Yelmalions do anything, it is by tradition—the militia must visit year after year, and perform the same ceremony each time. And each time, the ceremony is completed as instructed by the cult, and nothing happens. In fact, nobody in the militia knows why the task is carried out one year after the next, because nothing ever happens and why it was done the first place has been long forgotten. Only this time—no, only next time, and the time after that, it will be different, and perhaps the members of militia assigned the duty just might find out why the cult has been performing this ceremony for hundreds of years…
What this means is that if the scenario is played as is, it will not have the impact that playing it episodically will do. Essentially, being asked to return again and again to perform the ceremony at the Dark Watch Cave—without the benefit of a break in the narrative, signals to the Player Characters that their being at the cave is significant rather than the ordinary task it is initially intended to be. So, Tradition: Sandheart Volume Three is best played before, between, and after the events depicted in Tales of the Sun County Militia: Sandheart Volume 1 and The Corn Dolls: Sandheart Volume 2. The downside of this is that if you have already run either of those, then Tradition: Sandheart Volume Three takes more effort to implement. Another issue is one of what else to run between the parts of Tradition: Sandheart Volume Three. The setting and tone of the ‘Sandheart’ series is quite particular—and it is not one that is easily supported by the other scenarios available on the Jonstown Compendium. Advice to that purpose would have been useful. (Potential scenarios which would work include Jorthan’s Rescue Redux,* Rock’s Fall, and Blue Moon, White Moon.)
* Please note that for the purposes of transparency, I co-authored Jorthan’s Rescue Redux.
The Player Characters’ initial forays into the Dark Watch Cave will somewhat mundane, a simple task of lighting several braziers within its walls and then maintaining a vigil overnight. Here is a chance for them to explore the fullest extent of the cave and so educate themselves about its layout for when they return the next and subsequent years. However, the Dark Watch Cave has a deep, dark secret. It is home to a demon of darkness and deceit, one which is trying to escape its prison. Over the course of four tests—as the first four parts of Tradition: Sandheart Volume Three are known, the vigilance of the Player Characters will be tested again and again, as attempts to enter the cave and break their watch grow in their intensity and obviousness. In the early tests, they are actually quite amusing—and there is opportunity for some light-hearted roleplaying, but as the Player Characters return, they become vicious and ultimately spread to the wider area. In these later stages, the tests emphasises action and combat rather than roleplaying, but that reflects the threat which grows and grows over the course of Tradition: Sandheart Volume Three.
Ultimately, the likelihood is the Player Characters will fail and in order to defeat the darkness, the Player Characters will need to undertake a Hero Quest. Compared to the first part of the campaign framework, this is a radical change in pace, structure, and play style. It is very rigidly structured and both players and their characters—as well as the Game Master—need to be quite regimented in how they play through this. It presents some fantastic scenes, especially for Yelmalions as they fight against Darkness, and should they prevail, brings Tradition: Sandheart Volume Three—and if used in conjunction with Tales of the Sun County Militia: Sandheart Volume 1 and The Corn Dolls: Sandheart Volume 2—the ‘Sandheart’ campaign to a rousing climax.
In addition to a full description of Dark Watch Cave, Tradition: Sandheart Volume Three comes with three handouts, full stats for the NPCs and monsters, and multiple maps of the Dark Watch Cave. Some of the handouts are slightly lengthy and as the campaign framework progresses, it does grow in complexity and the need for increased preparation upon the part of the Game Master.
Is it worth your time?
Yes—Tradition: Sandheart Volume Three is an excellent campaign framework around which to structure the ‘Sandheart’ campaign and bring it to a rousing climax.No—Tradition: Sandheart Volume Three is not worth your time if you are running a campaign or scenarios set elsewhere, especially in Sartar.
Maybe—Tradition: Sandheart Volume Three might be useful for a campaign involving Yelmalions and the worship of Yelm from places other than Sun County, but its framework structure may be more challenging to use if the Game Master has already run Tales of the Sun County Militia: Sandheart Volume 1 or The Corn Dolls: Sandheart Volume 2—if not both.
[Free RPG Day 2020] Dungeon Crawl Classics Roleplaying Game Quick Start Rules & Intro Adventure

Like the support for Free RPG Day in 2017, 2018, and 2019, Goodman Games has released the Dungeon Crawl Classics Roleplaying Game Quick Start Rules & Intro Adventure, which provides an introduction to the publisher’s Dungeon Crawl Classics Roleplaying Game. It takes its cue from the Dungeon Crawl Classics Roleplaying Game Adventure Starter published in 2011, but has been expanded enough for the rules to cover characters from Zero Level to Second Level, provide two adventures, and introduce the key concepts of the roleplaying game. In the process, it has grown from sixteen to forty-eight pages. As with the previous versions from 2017, 2018, and 2019, the Dungeon Crawl Classics Roleplaying Game Quick Start Rules & Intro Adventure can be divided into three parts. The longest are rules, followed by a short introductory adventure and then by flipping the booklet over, a longer adventure.
Derived from the d20 System, the Dungeon Crawl Classics Roleplaying Game sits somewhere between Basic Dungeons & Dragons and Advanced Dungeons & Dragons in terms of its complexity. The most radical step in the Dungeon Crawl Classics Roleplaying Game is the starting point. Players begin by playing not one, but several Zero Level characters, each a serf or peasant looking beyond a life tied to the fields and the seasons or the forge and the hammer to prove themselves and perhaps progress enough to become a skilled adventurer and eventually make a name for themselves. In other words, to advance from Zero Level to First Level. Unfortunately, delving into tombs and the lairs of both men and beasts is a risky venture and death is all but a certainty for the lone delver… In numbers, there is the chance that one or more will survive long enough to go onto greater things! This is what the Dungeon Crawl Classics Roleplaying Game terms a ‘Character Creation Funnel’.
Dungeon Crawl Classics Roleplaying Game Quick Start Rules & Intro Adventure provides rules for the creation process, a player rolling for six Abilities—Strength, Agility, Stamina, Personality, Intelligence, and Luck—in strict order on three six-sided dice, plus Hit Points on a four-sided die and an occupation. The latter will determine the character’s Race—Race is a Class in the Dungeon Crawl Classics Roleplaying Game just as it was in Basic Dungeons & Dragons, a weapon, and a possession related to his occupation.
Farmer Galton
Zero Level Human Mendicant
STR 9 (+0) AGL 9 (+0) STM 12 (+0)
PER 8 (-1) INT 10 (+0) LCK 11 (+0)
Hit Points: 4
Saving Throws
Fortitude +0 Reflex +0 Willpower +0
Alignment: Lawful
Birth Augur: Harsh Winter
Luck Benefit: All Attack Rolls
Weapon: Pitchfork (1d6)
Equipment: Hen (Daisy)
34cp
Of the stats, only Luck requires any explanation. It can be used for various skill checks and rolls, but its primary use is for each character’s single Luck Benefit—which unfortunately, Farmer Galton lacks. It is burned when used in this fashion and can only be regained by a player roleplaying his character to his Alignment. The Luck bonus also applies to critical hit, fumble, and corruption rolls as well as various Class-based rolls. For example, the Elf receives it as a bonus to rolls for one single spell and a Warrior to rolls for a single weapon such as a longsword or a war hammer. Further, both the Thief and the Halfling Classes are exceptionally lucky. Not only is the Halfling’s Luck bonus doubled and the Thief’s determined by a random roll when they burn Luck, they actually regain Luck each day equal to their Level. In addition, if a party has a Halfling amongst its numbers that Halfling can pass his expended Luck to other members of the party!
Mechanically, for a character to do anything, whether Sneak Silently, cast a spell, or make an attack, a player rolls a twenty-sided die and after adding any bonuses hopes to beat a Difficulty Class or an Armor Class. Rolls of one are a fumble and rolls of a twenty are a critical. The Dungeon Crawl Classics Roleplaying Game Quick Start Rules & Intro Adventure includes a Fumble Table as well Critical Hit Tables for each of the Classes. Famously, the Dungeon Crawl Classics Roleplaying Game also uses a multitude of dice, including three, five, seven, fourteen, sixteen, twenty-four, and thirty-sided dice as well as the standard polyhedral dice. Although penalties and bonuses can be applied to dice rolls, the dice themselves can get better or worse, stepping up or stepping down a size depending upon the situation. For example, a Warrior can attack twice in a Round instead of attacking and moving, but makes the first attack using a twenty-sided die and the second attack using a sixteen-sided die. Fortunately, neither of the scenarios in the Dungeon Crawl Classics Roleplaying Game Quick Start Rules & Intro Adventure make much use of this full polyhedral panoply, but if necessary, dice rolling apps can be found which will handle such dice rolls.
Magic works differently to the Vancian arrangement typically seen in Dungeons & Dragons. Magic is mercurial. What this means is that from one casting of a spell to the next, a spell can have different results. For example, the classic standby of First Level Wizards everywhere, Magic Missile, might manifest as a meteor, a screaming, clawing eagle, a ray of frost, a force axe, or so on. When cast, a Wizard might throw a single Magic Missile that only does a single point of damage; one that might do normal damage; unleash multiple missiles or a single powerful one; and so on. Alternatively, the Wizard’s casting might result in a Misfire, which for Magic Missile might cause the caster’s allies or himself to be hit by multiple Magic Missiles, or to blow a hole under the caster’s feet! Worse, the casting of the spell might have a Corrupting influence upon the caster, which for Magic Missile might cause the skin of the caster’s hands and forearms to change colour to acid green or become translucent or to become invisible every time he casts Magic Missile! This is in addition to the chances of the Wizard suffering from Major or even Greater Corruption… Some ten spells are detailed Dungeon Crawl Classics Roleplaying Game Quick Start Rules & Intro Adventure, taking up roughly, a quarter of the booklet.
One of the major differences between the 2018 version of the Dungeon Crawl Classics Roleplaying Game Quick Start Rules & Intro Adventure and the editions before it was the range of spells it included for the Cleric and Wizard Classes. Notably, it Magic Missile with Choking Cloud and Colour Spray for the Wizard. The 2019 version was tweaked again, and similarly, the 2020 version has also been tweaked. So instead of Magic Missile, the Wizard has Flaming Hands.
Once past the funnel, the characters can move up to First Level and acquire a proper Class—either Cleric, Thief, Warrior, or Wizard, or one of the Races, Dwarf, Elf, or Halfling. Further information is provided so that a character can progress to Second Level. The adventures in Dungeon Crawl Classics Roleplaying Game Quick Start Rules & Intro Adventure should be enough for a character to reach First Level. Getting to Second Level and the second adventure is another issue, at least with this version of the Dungeon Crawl Classics Roleplaying Game Quick Start Rules & Intro Adventure.
Dungeon Crawl Classics Roleplaying Game Quick Start Rules & Intro Adventure includes two adventures. The first, which immediately follows the rules is ‘The Portal Under The Stairs’, which appeared in the original Dungeon Crawl Classics Roleplaying Game Adventure Starter back in 2011. This has the would-be adventurers venturing into an ancient war-wizard’s tomb after its entryway becomes open when the stars come right. Designed for Zero Level and First Level characters this is a short, just ten location dungeon primarily consisting of traps and puzzles with some deadly combat encounters thrown in. Its three pages are short enough that a group could roll up their characters and funnel them through the adventure to see who survives in a single session. The second scenario, located on the opposite side of Dungeon Crawl Classics Roleplaying Game Quick Start Rules & Intro Adventure is a Level 1 adventure, ‘The Legend of the Silver Skull’.
The other adventures in the Dungeon Crawl Classics Roleplaying Game Quick Start Rules & Intro Adventure have been different each time. ‘Gnole House’, the adventure from the Dungeon Crawl Classics Roleplaying Game Quick Start Rules & Intro Adventure from 2017 was inspired by the writings of Lord Dunsany and presented a bucolic, genteel demesne, a lonely house full of detail and hidden horrors. Where ‘Gnole House’ provided a good mix of exploration and examination with some combat and a little roleplaying, the scenario for the Dungeon Crawl Classics Roleplaying Game Quick Start Rules & Intro Adventure from 2018, ‘Man-Bait for the Soul Stealer’ was again different. It was a classic dungeon, as was ‘Geas of the Star-chons’, the second adventure in the Dungeon Crawl Classics Roleplaying Game Quick Start Rules & Intro Adventure from 2019—and the Dungeon Crawl Classics Roleplaying Game Quick Start Rules & Intro Adventure continues this trend for 2020.
In ‘The Legend of the Silver Skull’, the Player Characters are lured to a mysterious island with a skull atop its single barren hill, with promises of treasure. Inside the skull they find stairs going down to a damp, water-surrounded complex of rooms where fishmen and other salty creatures lurk… Both dungeon and adventure are quite straightforward, the former consisting of just eight rooms and it being highly possible for the Player Characters to discover and confront the antagonist behind the plot very shortly. What nicely drives the Player Characters into the confrontation is a series of visions one of them will suffer throughout the adventure, and if they defeat the antagonist and survive, then the adventure comes with a decent handful of plot hooks and a really nice artefact—if any Lawful Cleric will the Player Characters use it. However, The Legend of the Silver Skull’ is not an enticing adventure or a bad adventure or a good adventure. It is simply okay for s single session’s worth of dungeoneering. To be honest, the only thing to be said against it, is the fact that it is not set entirely within a giant skull. That, as they say, would have been cool…
Physically, the 2020 version of Dungeon Crawl Classics Roleplaying Game Quick Start Rules & Intro Adventure is, like the previous versions, well presented, the writing is clear, and artwork is in general excellent throughout, echoing the style and ethos of the three core rulebooks for Advanced Dungeons & Dragons. Notable for this edition is cover—which depicts the demon skull, iconic to the Dungeon Crawl Classics Roleplaying Game, in gold on a black background. It really stands out.
As in past years, the Dungeon Crawl Classics Roleplaying Game Quick Start Rules & Intro Adventure is a good package. The rules are nicely explained, the style of game is nicely explained, the artwork is good, the two adventures are good, if disconnected. Any player or Game Master with any experience of Dungeons & Dragons will pick this up with ease and be able to bring it to the table with relatively little experience—and once the first adventure is complete, quickly graduate onto running the second. Overall, ‘The Portal Under The Stairs’ might be getting somewhat long in the tooth, but ‘The Legend of the Silver Skull’ is a fun one session adventure of visionary and potentially fishy weirdness, together serving to make The Dungeon Crawl Classics Roleplaying Game Quick Start Rules & Intro Adventure simply a good introduction to the game and a bit more.
Have a Safe Weekend
[Free RPG Day 2020] Rain of Mercy

Rain of Mercy is an introduction to the grim darkness of the 41st Millennium and Warhammer 40,000 Roleplay: Wrath & Glory, published by Cubicle Seven Entertainment. Fairly short, in just sixteen pages it provides an introduction to the setting of the 41st Millennium, an overview of the specific setting for Warhammer 40,000 Roleplay: Wrath & Glory, and a short scenario designed to be played by four players and the Game Master and if not the full mechanics of the roleplaying game. It does not however, provide a full introduction to the mechanics of Warhammer 40,000 Roleplay: Wrath & Glory, but the given explanation is sufficient to play through the included scenario, ‘Rain of Mercy’.
The setting for Warhammer 40,000 Roleplay: Wrath & Glory is of course, the Imperium of Man, over which the Emperor, his body a rotting carcass sustained only by power from the Dark Age of Technology, has maintained a watch from the Golden Throne of Holy Terra. His mind is the very beacon by which the great ships of the Imperium the Warp and travel between the stars. They ferry not just goods and people, but also the Adeptus Astartes, the Space Marines, bio-engineered super-warriors, and members of the Imperial Guard, the ever-vigilant Inquisition, and the Tech-Priests of the Adeptus Mechanicus, from world to world, to investigate and scourge untold xenos, heretics, mutants, and more—including Chaos! Of course, this setting is better known as the background for Games Workshop’s Warhammer 40,000 miniatures wargame, in Warhammer 40,000 Roleplay: Wrath & Glory the focus will be on induvial rather than military regiments and units.
The specific setting Warhammer 40,000 Roleplay: Wrath & Glory is the forsaken Gilead System, which lies beyond the Great Rift, left behind by the Cicatrix Maledictum, the Warp Storm which rent the Imperium in two. The Gilead System is home to several different worlds, such as Avachrus, the Forge World, where the system’s technology is built and maintained; Ostia, the Agri World whose farmer are driven to point of starvation by having to feed the Gilead System; Gilead Primus, a Hive World home to billions; and Enoch, the Shrine World dedicated to the worship of the Emperor. Three years after the Great Rift, a flotilla of ships under the command of Rogue Trader Jakel Varonius, arrived in the system, having managed to find a stable route across the rift, bringing order and relief to the Gilead System which was on the point of collapse, suffering under the weight of too many refugees, most of them pilgrims to the Shrine World of Enoch, stranded by the opening of the Great Rift.
The Player Characters are assembled by Jakel Varonious to undertake a mission for the Ecclesiarchy. A troubling situation has arisen on Enoch, the Shrine World of thin desert land masses amidst extensive oceans, these land masses consisting of shrines around which cluster tent cities inhabited by refugees. A new cult has arisen amongst the slums—the Water Bringers, which might be loyal to the Emperor, but might also be a gang extorting money for the water it appears to have a ready supply of, and there is also talk of new saint on Enoch as well. The characters are charged with infiltrating the Water Bringers and determine the veracity of the supposed saint—be they unsanctioned Psyker, heretic, or one of the Emperor’s blessed. The scenario is short, but involves a reasonable mix of interaction, investigation, and combat, and ultimately leaves the outcome very much in the hands of the players and their characters.
The four characters consist of a Space Marine Scout who dreams of becoming a fully fledged Space Marine; a zealous and uncompromising member of the Adepta Soroitas, a Sister of Battle; a Skitarius and Tech-Priest, who monitors for the use of heretical tech; and a silver-tongued Rogue Trader. All four consist of a description, a nice illustration, some combat stats, and a single ability. For example, the Space Marine Scout always goes first in combat and once per game can attack twice per combat round, whilst the Sister of Battle can pray to the Emperor and once per game, cause an attack to miss any target.
Mechanically, Warhammer 40,000 Roleplay: Wrath & Glory employs a six-sided dice pool system. Results of four and five generate single Icons, whilst rolls of six generate two. If the total roll generates more Icons than the Difficulty Number, then the Player Character or NPC succeeds at the task. Good roleplaying can earn a player Wrath points which can be spent to reroll results of one, two, or three. And that really is the extent of the explanation of the mechanics for Warhammer 40,000 Roleplay: Wrath & Glory in Rain of Mercy, bar rolling for damage in combat. Indeed, there is not even a skill system or anything in the way of attributes for characters presented in Rain of Mercy. Instead, the Difficulty Numbers are given for possible actions by the pregenerated Player Characters—Cunning or Persuasion Tests, Intimidation or Leadership Tests, and so on—in individual scenes. This gives rise to a couple of issues with Rain of Mercy as an introduction to Warhammer 40,000 Roleplay: Wrath & Glory.
Mechanically, what it ignores is the possibility of rolls of six generate extra effects and the use of the Wrath die, which can either trigger a gloriously gory critical hit in combat or a narrative Complication. Narratively, the lack of a skills system or any attributes placed in front of the players reduces their agency because they do not know what their characters can do or what they are good at. Now there is some indication in the Player Character descriptions, but that is not quite as easily digestible as a skills list. On the plus side, this means that the rules are fast, and the rules are furious, and the rules are easy, and the rules are simplistic, but on the downside, it means that whilst Rain of Mercy is playable as is, it does not properly prepare either the Game Master or the players to play the full version of Warhammer 40,000 Roleplay: Wrath & Glory.
Physically, Rain of Mercy is well written and well presented. It is not extensively illustrated, but the full colour illustrations are excellent.
There is a great deal to like about Rain of Mercy. The booklet is well presented, the explanation of the background is good, the scenario is decent, and it is all nicely playable in a session or so. However, as an introduction to Warhammer 40,000 Roleplay: Wrath & Glory, the fact is that Rain of Mercy is severely underwritten in terms of the mechanics. It simply fails to give enough of an impression as to what those rules are and how they work in play, the result being that Rain of Mercy only succeeds as an introduction to the setting of Warhammer 40,000 Roleplay: Wrath & Glory; as an introduction to the mechanics of Warhammer 40,000 Roleplay: Wrath & Glory it is a complete and utter failure.
What's So Innovative about Night Shift: VSW?
My NIGHT SHIFT co-author Jason Vey has a bit to say on the design and innovation of our Modern Supernatural RPG.

You can read it about it all here: https://wastedlandsfantasy.blogspot.com/2020/09/whats-so-innovative-about-night-shift.html
Jason makes a lot of fantastic points. So many in fact that I do not feel the need to reiterate them here and now. Save where I want to talk about why I wanted to make this game. And even here I am going restate something Jason already said.
NIGHT SHIFT: Veterans of the Supernatural Wars was designed to be familiar.
For me though not just in terms of game design, in terms of the types of games I have been playing over the last 20 some odd years.
In 1999 I was facing something of a crisis of my RPG playing. I had been playing D&D for 20 years solid by that point, with minor breaks due to college, grad school, and getting married. I had bought a house and had a kid on the way. Plus in 1999 D&D was feeling tired and old. I had played some other games, namely World of Darkness and other horror games. I had recently picked back up Chill, but none of these had lit the spark the way D&D had.
That is until I found CJ Carella's WitchCraft RPG. Now here was a game I loved and it relit the long dormant fires of RPG creativity. From here I picked up Kult, found more and more games. Soon I was freelancing at Eden. Then Jason and I were working together on Buffy, Angel, Army of Darkness, and more. But D&D was still that first love. At the same time the d20 boon was happening and there were a lot of new great games coming out based on the d20 OGL and more still based on the principles of the OGL. I went from a "dark time" to a new Golden Age in just a couple of years.
NIGHT SHIFT hooks into that familiarity.
The rules are a streamlined version of the d20/OGC with an "old-school" bend.
The situations are modern supernatural, so there feels like there is a "world continuity" with games I was playing using Chill, Kult, CoC, Mage, WitchCraft, and Buffy.
I want a game that can take me to the next 20 years of gaming and I truly think this one is it.
You can get hardcovers of NIGHT SHIFT from my publisher's webpage or PDFs via DriveThruRPG.
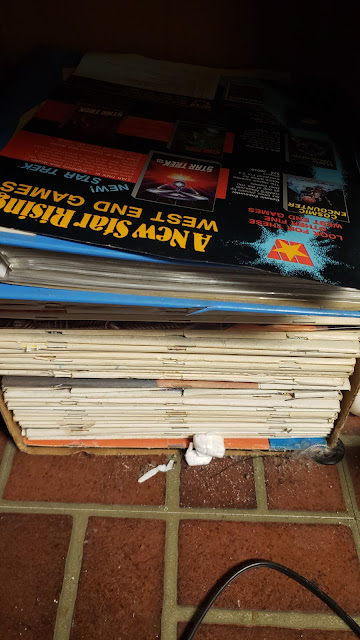
Sunday Morning Porch Sale: September 6, 2020. Look For The Union Label.
BlackStar: Star Trek Dark & Scary
Today is September 8 and that is Star Trek day. It was on this day that Star Trek premiered in 1966.

So to combine my love of horror and Trek here are some lists of dark and scary Trek episodes.
And a reminder from Dr. Leonard "Bones" McCoy that you really don't need to create a lot of horror for space. It's pretty damn scary as is.
Happy Star Trek Day!
Monstrous Monday: Galley Beggar
My thoughts are still on Halloween. So time to bring back another monster from my younger days.
Galley Beggar
Medium Undead (Incorporeal)
Frequency: Very Rare
Number Appearing: 1 (0)
Alignment: Chaotic (Chaotic Neutral, Chaotic Evil)
Movement: 120' (40') [12"] (Limited to 100' from bones)
Armor Class: NA [NA]
Hit Dice: 1d8 (1 hp)
Attacks: 1 scream
Damage: NA (see below)
Special: Can't be hit by physical weapons (Mundane or Magical); immune to charm, hold, and sleep spells.
Size: Medium
Save: Monster 1
Morale: 12
Treasure Hoard Class: See Below
XP: 5 (50 if bones destroyed)
The Galley Beggar, also known as a Bull Beggar, is a type of ghost found in crypts, dungeons, and even old cellars. They appear as a thin, skeletal looking ghoul in the poor light of dungeons, but are semi-transparent. They are incorporeal (ghost-like) and are immune to physical attacks of any sort and any mind-affecting magics.
The Galley Beggar has only one attack, a scream that causes fear (as per the spell) in all who hear it. Everyone with 100 feet of the screaming monster must make a Save vs. Spells or come under the effects of the fear. Creatures greater than 6 HD are immune. A favorite trick of the Galley Beggar is to pull it's own head off of its body and then scream.
The only ways to defeat a Galley Beggar are with Clerical Turning, they will turn as Skeletons (1 HD) or via any magic like Bless, Remove Curse, Dispell Magic, or similar enchantments. If the bones of the Galley Beggar are found and destroyed (with fire or given a proper burial) then the creature is also destroyed.
It is believed that the Galley Beggar is formed when a novice spell caster is killed on an adventure and their bodies are not returned for burial. The Galley Begger will not form until the body has decayed to bones.
Pages