On the tail of the Old School Renaissance has come another movement—the rise of the fanzine. Although the fanzine—a nonprofessional and nonofficial publication produced by fans of a particular cultural phenomenon, got its start in Science Fiction fandom, in the gaming hobby it first started with
Chess and
Diplomacy fanzines before finding fertile ground in the roleplaying hobby in the 1970s. Here these amateurish publications allowed the hobby a public space for two things. First, they were somewhere that the hobby could voice opinions and ideas that lay outside those of a game’s publisher. Second, in the Golden Age of roleplaying when the Dungeon Masters were expected to create their own settings and adventures, they also provided a rough and ready source of support for the game of your choice. Many also served as vehicles for the fanzine editor’s house campaign and thus they showed another DM and group played said game. This would often change over time if a fanzine accepted submissions. Initially, fanzines were primarily dedicated to the big three RPGs of the 1970s—
Dungeons & Dragons,
RuneQuest, and
Traveller—but fanzines have appeared dedicated to other RPGs since, some of which helped keep a game popular in the face of no official support.
Since 2008 with the publication of
Fight On #1, the Old School Renaissance has had its own fanzines. The advantage of the Old School Renaissance is that the various Retroclones draw from the same source and thus one
Dungeons & Dragons-style RPG is compatible with another. This means that the contents of one fanzine will be compatible with the Retroclone that you already run and play even if not specifically written for it.
Labyrinth Lord and
Lamentations of the Flame Princess Weird Fantasy Roleplay have proved to be popular choices to base fanzines around, as has
Swords & Wizardry. However, fantasy is not the only genre to be explored in the pages of the fanzine renaissance.
Just as a number of fanzines have appeared to support Goodman Games’
Dungeon Crawl Classics Role Playing Game, such as
Crawl!, a number have also appeared to support
Mutant Crawl Classics Roleplaying Game – Triumph & Technology Won by Mutants & Magic and the Post-Apocalypse genre. For example,
Bunker,
Gamma Zine, and
Meandering. The latest is
Scientific Barbarian, its content written for use with the
Mutant Crawl Classics Roleplaying Game and published by
Mudpuppy Games. Edited by Jim Wampler, designer of the
Mutant Crawl Classics Roleplaying Game, its contents can of course, be adapted to other Post-Apocalypse roleplaying games.
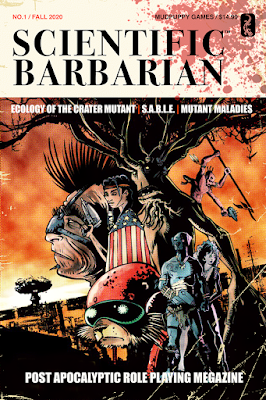
Scientific Barbarian #1 was published in the autumn of 2020 following a successful
Kickstarter campaign. As you would expect, it comes full of robots, mutations and maladies, and monsters aplenty, as well as a sizable techno-dungeon. With its excellent cover aping the look of
Scientific American,
Scientific Barbarian #1 is cleanly laid out, illustrated with a range of decent artwork, and is an easy read. It opens with ‘Bunker Briefings’, an editorial in which Wampler sets out his stall, stating that the fanzine is designed to support the ‘Mutant Murder Hobo’ style of play and welcomes those who have come across the fantasy genre to this one. The latter theme is continued with ‘Apocalyptic Visions – It’s Okay to have 87 Eyes’, in which Tim Kask extolls the virtues of mutations in Post-Apocalypse roleplaying games, particularly the joy of playing and roleplaying defects.
The contents get a proper start with Levi Combs’ ‘Ecology of the Crater Mutant’. This describes the barbarous, hardy mutants who worship and are mutated by a great source of radiation located at the heart of the crater where they live. Their faith in The Gospel of the Glow drives them to kidnap others and expose them to the radiation and so transform them into members of the ‘family’. The Crater Mutants are cross between Orcs and hillbillies and definitely support the ‘Mutant Murder Hobo’ style of play. It does feel overwritten, as if it could have been shorter, but that tends to be the way of such ecology articles. It is followed by ‘S.A.B.L.E. Rangers – Security Automations for Basic Law Enforcement’ by Michael Stewart and Elizabeth Stewart which details a law enforcement initiative begun in the ‘before times’ of the thirtieth century, aiming to combine the impartial judgement of A.I. law enforcement with the moral oversight of a human partner, thus mitigating human prejudices and sympathies. The programme developer, Automates, Inc., built several prototypes before the Great Disaster which buried its manufacturing complexes. Recent tectonic shifting has exposed the complexes, allowing the prototypes, each in the friendly form of a robotic horse, to escape and begin their duties as law enforcement devices. A S.A.B.L.E. Ranger unit—of which three types are detailed in the article—might already be found with a partner sitting astride it, but the obvious option and the one explored more fully is ‘A Sentient and the Horse’, in which the robot teams up with a Player Character. In addition to the obvious nod to
A Dog and his Boy, the article nicely explores the idea and sets up great roleplaying potential between the Player Character and the S.A.B.L.E. Ranger unit, effectively giving the Judge a Player Character of her own to play. This would lend itself to play with just the Judge and a single player, but it could also work with another player roleplaying the S.A.B.L.E. Ranger unit too, although that is not supported in the article. Which is a pity as it is a missed opportunity. There is a Saturday morning cartoon and very American Wild West feel to the article, but otherwise an engaging piece.
‘Mutant Maladies’ by Skeeter Green is a preview of a forthcoming supplement of the same name which adds diseases and contagions to the Post Apocalypse. It gives stats and effects for several diseases, including AMD-6 or ‘Marrowblight’, which hardens the bone marrow of Pure Strain Humans, or Ultra-Coagulation or ‘Thickblood’, which turns the liquid blood of its sufferers into goop. The three diseases are described in some detail, but whilst their utility is obvious, it may be limited, since the Judge may not want to expose her Player Characters to such maladies too often, since their debilitating effects may impede game play. This is not to say that the diseases are not well designed or that the article is not decently written, but of limited scope. More useful then, is ‘Glowing Good Looks’ by James M. Ward, the designer of both
Metamorphosis Alpha and
Gamma World, which presents a set of three tables to be rolled on whenever a saving throw versus radiation is missed or fumbled. There are tables for humanoids, winged-folk, and four-legged mutants, all of which provide minor mutations. As promised, these are quick and easy, and sufficiently utilitarian that they work with any post-apocalyptic roleplaying game.
Pride of place in Scientific Barbarian #1 goes to Jim Wampler’s ‘The Gene Looms of Janeck-Vac’. Designed for Player Characters of Fourth and Fifth Levels, this scenario has a traditional set-up—a village suddenly imperilled by a rash of strange creatures with new mutations appearing from the nearby jungles and the Player Characters ordered by the tribal elders to investigate and put a stop to it. After a few encounters in the jungle with these strange creatures—swarms of Batslugs, Spiderhogs, and Cobrapedes—they come upon a caldera and below that a facility of the ancients full of strange devices the interfering of which will have unfathomable consequences for the Player Characters, but then again, they are Player Characters and this is the
Mutant Crawl Classics Roleplaying Game, so of course they will interfere. As the title of the scenario suggests, the underground complex is a genetics laboratory, and if they are careful, there are lots of secrets to be discovered and even the real Janeck-Vac to be encountered. If they are really lucky, there are some singular artefacts of the Ancients which would make fine additions to the Player Characters’ equipment and provide some excellent roleplaying opportunities into the bargain. As well as a decent set of floorplans for the facility, the scenario is accompanied by stats and write-ups for all eight of the weird mutant strains that the genetics laboratory has released to date, which of course, could appear elsewhere in the Omega-Terra of the Judge’s own campaign. The structure of the scenario does feel familiar, having been seen in multiple scenarios for
Mutant Crawl Classics Roleplaying Game and other Post-Apocalypse roleplaying games before, but it is nicely detailed and adds a twist or two on the threat from the past coming back to haunt the future.
The monsters found in ‘The Gene Looms of Janeck-Vac’ are not the only ones to be found in
Scientific Barbarian #1. ‘Creature Cryptology’ provides a half dozen new creatures which the Judge can include in her campaign. Some, like the ‘Eye-Cap’ is a weird variation upon a
Dungeons & Dragons-style monster, the occasionally mobile, sentient fungus covered in chitinous plates and eyestalks which grant it 360° vision and which can launch a cloud of tiny flying eye spores each capable of firing an infrared laser beam! This is a nasty creature whose main means of attack can only be targeted by area effect attacks. Others are particular to the genre and the setting, such as the ‘Gem Thief’, a holographic data crystal which attempts to mind control its current possessor and subtly directs him to where others of its kind might be found. In fact, each ‘Gem Thief’ once belonged to a lost A.I. deity and seeks to find others of its kind to resurrect the A.I. deity. The nature and identity of the lost A.I. deity is left up to the Judge to decide. Overall, the selection to be found in ‘Creature Cryptology’ is variable in terms of quality or usefulness, but that is the nature of the fanzine, plus the Judge can easily adjust any one of the new creatures in the issue.
Rounding out
Scientific Barbarian #1 is a ‘Retro-Review’ of Jack Kirby’s
Kamandi, the Last Boy on Earth. Written by Scott Robinson, the review focusses mainly on the reviewer’s personal reaction to the collected omnibus—now and original issues when he was thirteen years old. The result is oddly uninformative and so not all that helpful to the reader when determining his interest in
Kamandi, the Last Boy on Earth. This could have been addressed by the editor as well. The review is followed by a pair of cartoon strips, one an excerpt from the comic strip,
Knights of the Dinner Table, the other entitled ‘Onto the Wasteland…’ Together they bring the first issue of
Scientific Barbarian #1 to an entertaining close.
Scientific Barbarian #1 is something of a curate’s egg—partly bad and partly good. Or rather partly merely adequate and partly good. There are perhaps a few too many monsters in the issue, what with monsters in both the scenario and their department, the review could have been much tighter, and other articles shorter. Oddly, for a fanzine dedicated to
Mutant Crawl Classics Roleplaying Game, there is a lack of new technology described in its pages. However, the table of new mutations is efficient and useful, the write-up and development of the S.A.B.L.E. Ranger unit concept is nicely done, and of course, ‘The Gene Looms of Janeck-Vac’ is a decent scenario with some hidden depths to it. Overall, the good definitely outweighs the not so good and just like the magazine it pastiches,
Scientific Barbarian #1 is the first issue of fanzine which should be worth subscribing to, whatever Post-Apocalypse roleplaying game you already have a subscription for.


")


